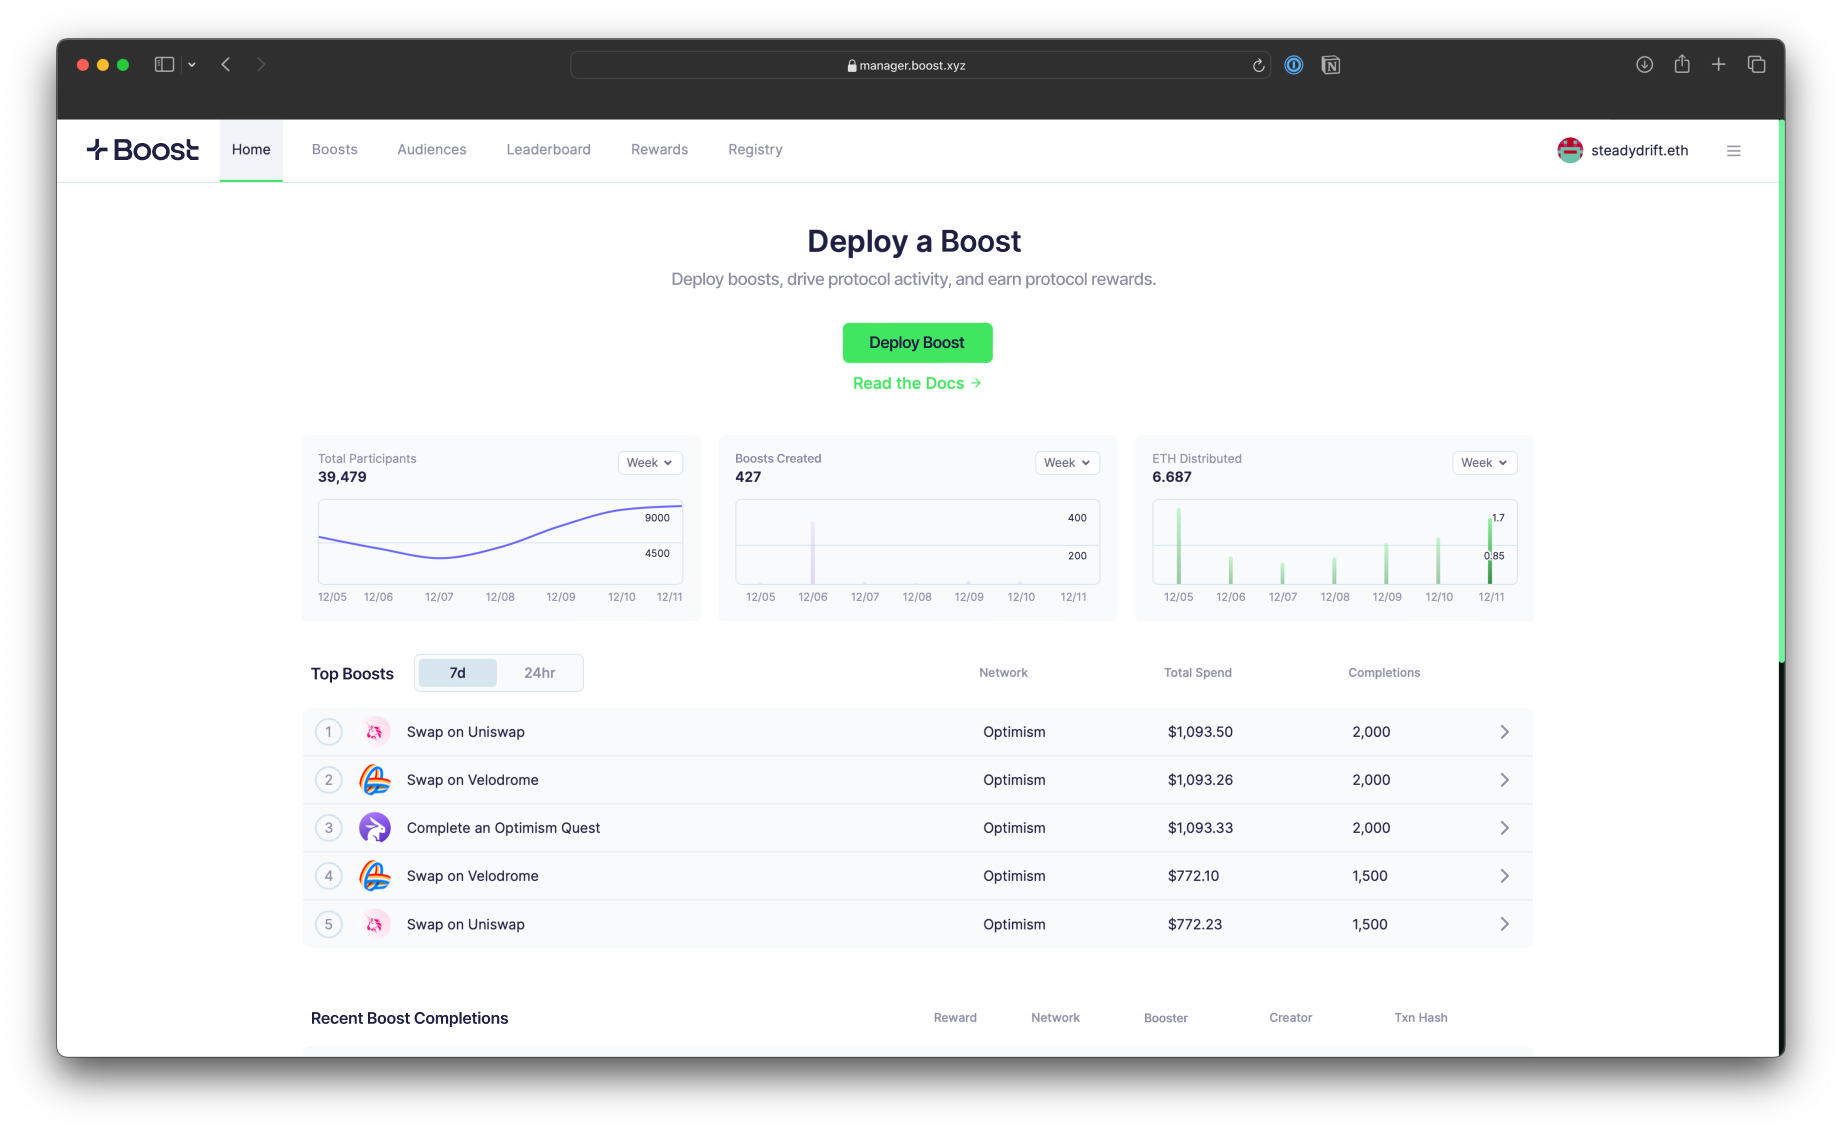
- Set your goal and target: Configure the smart contract parameters with the onchain action you’d like incentivize.
- Select your target allowlist: Upload a CSV or choose from a list of preset audiences to create a custom-targeted allowlist (optional).
- Deposit and deploy instantly: Deposit as little a cent and only pay for results.
Selecting an Action
To create a boost, you must first select the project you want to issue a boost for and the onchain action you’d like to incentivize. Boost Protocol currently supports creating boosts for 60+ projects. For the full list of supported projects and action types, view the Boost Registry page.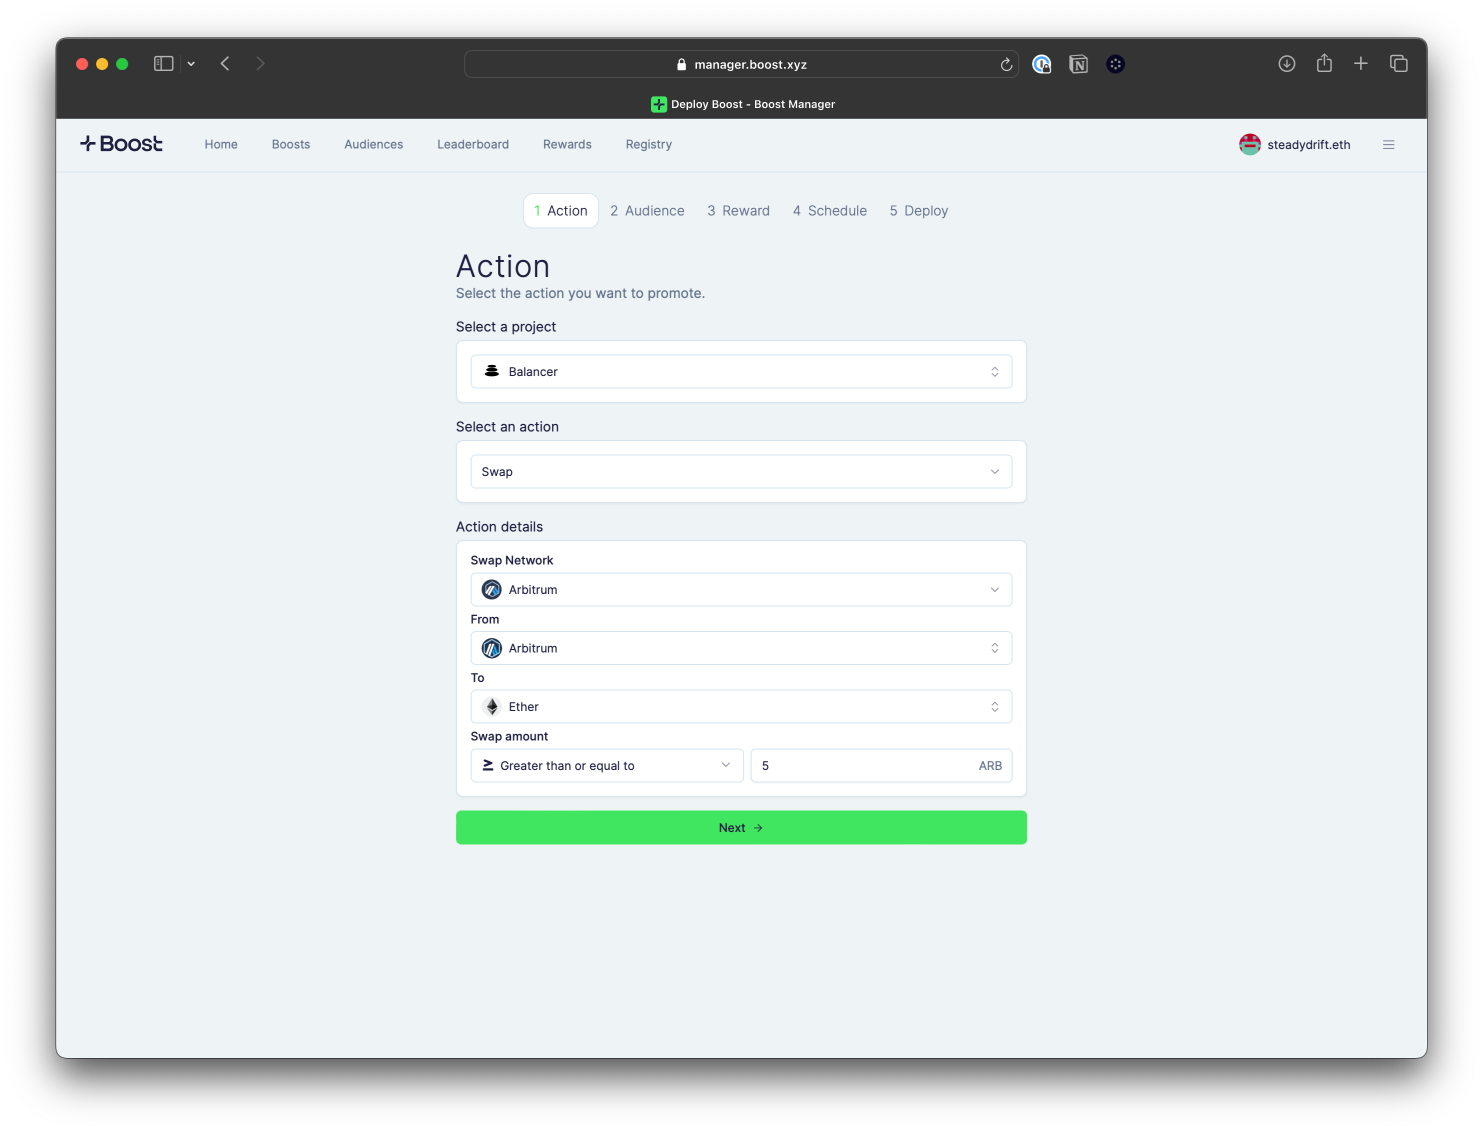
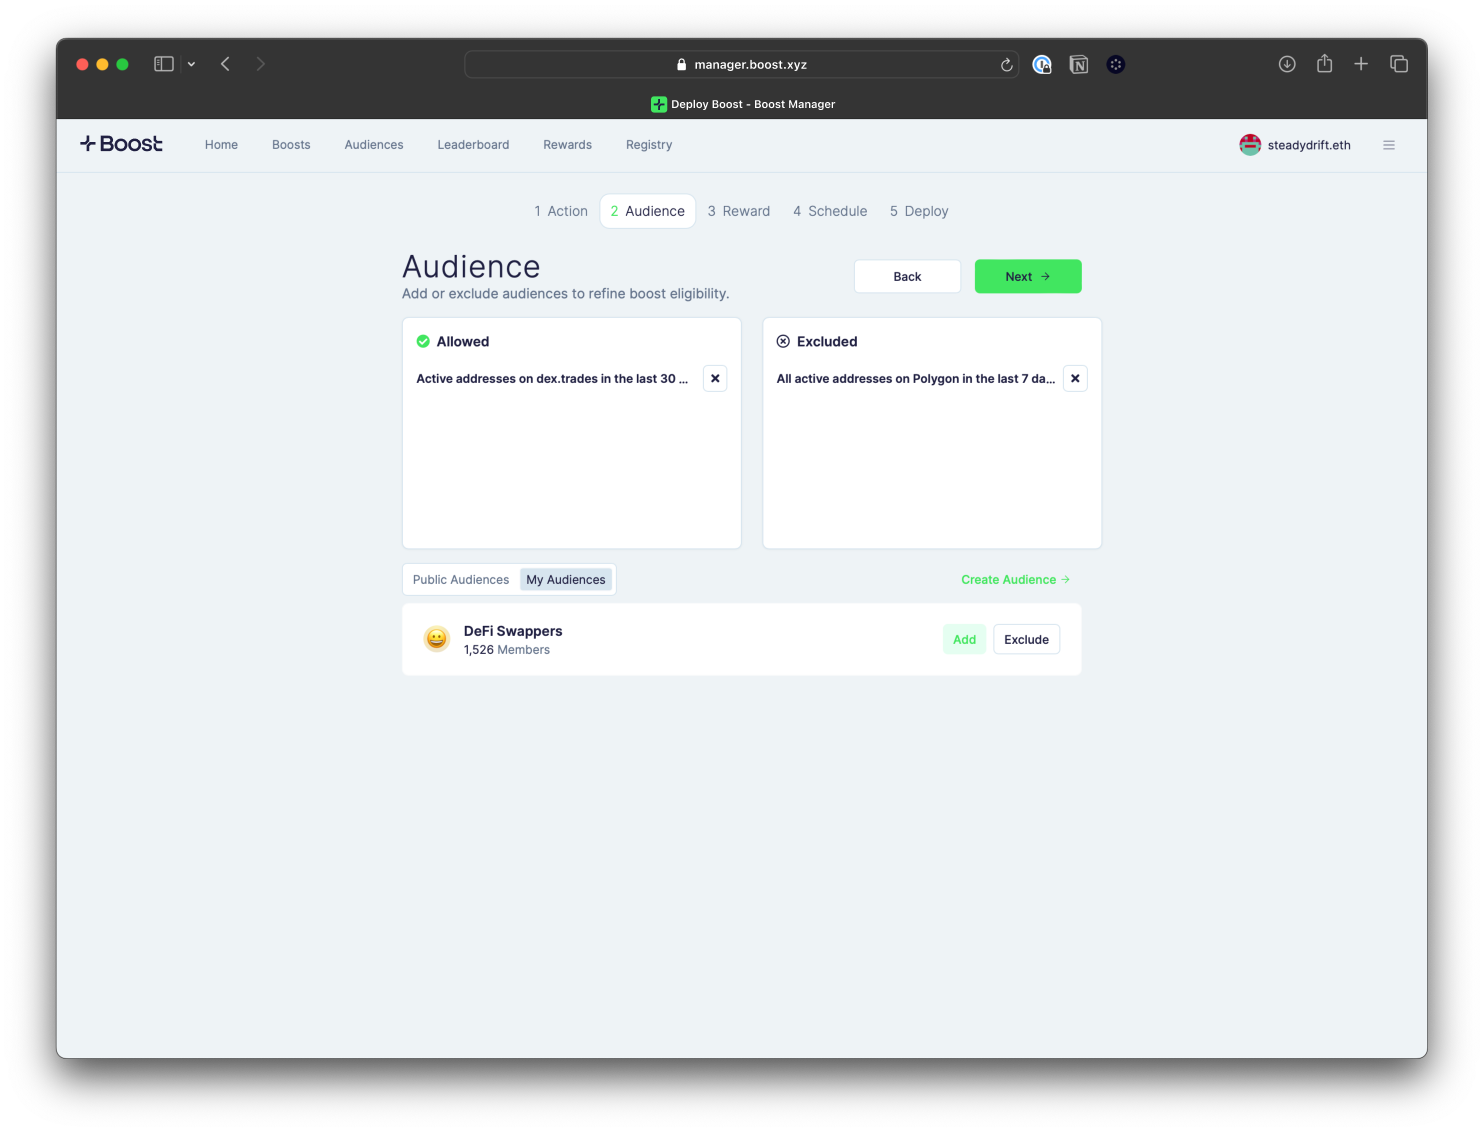
Selecting an Audience
Choosing the right target users is one of the most important steps to achieve your goals. Boost Manager comes with a variety of preset audience lists that you can select from. Easily choose who should be eligible to receive the boost incentive and who should be excluded. You can also upload your own list of wallet addresses to create custom audience lists.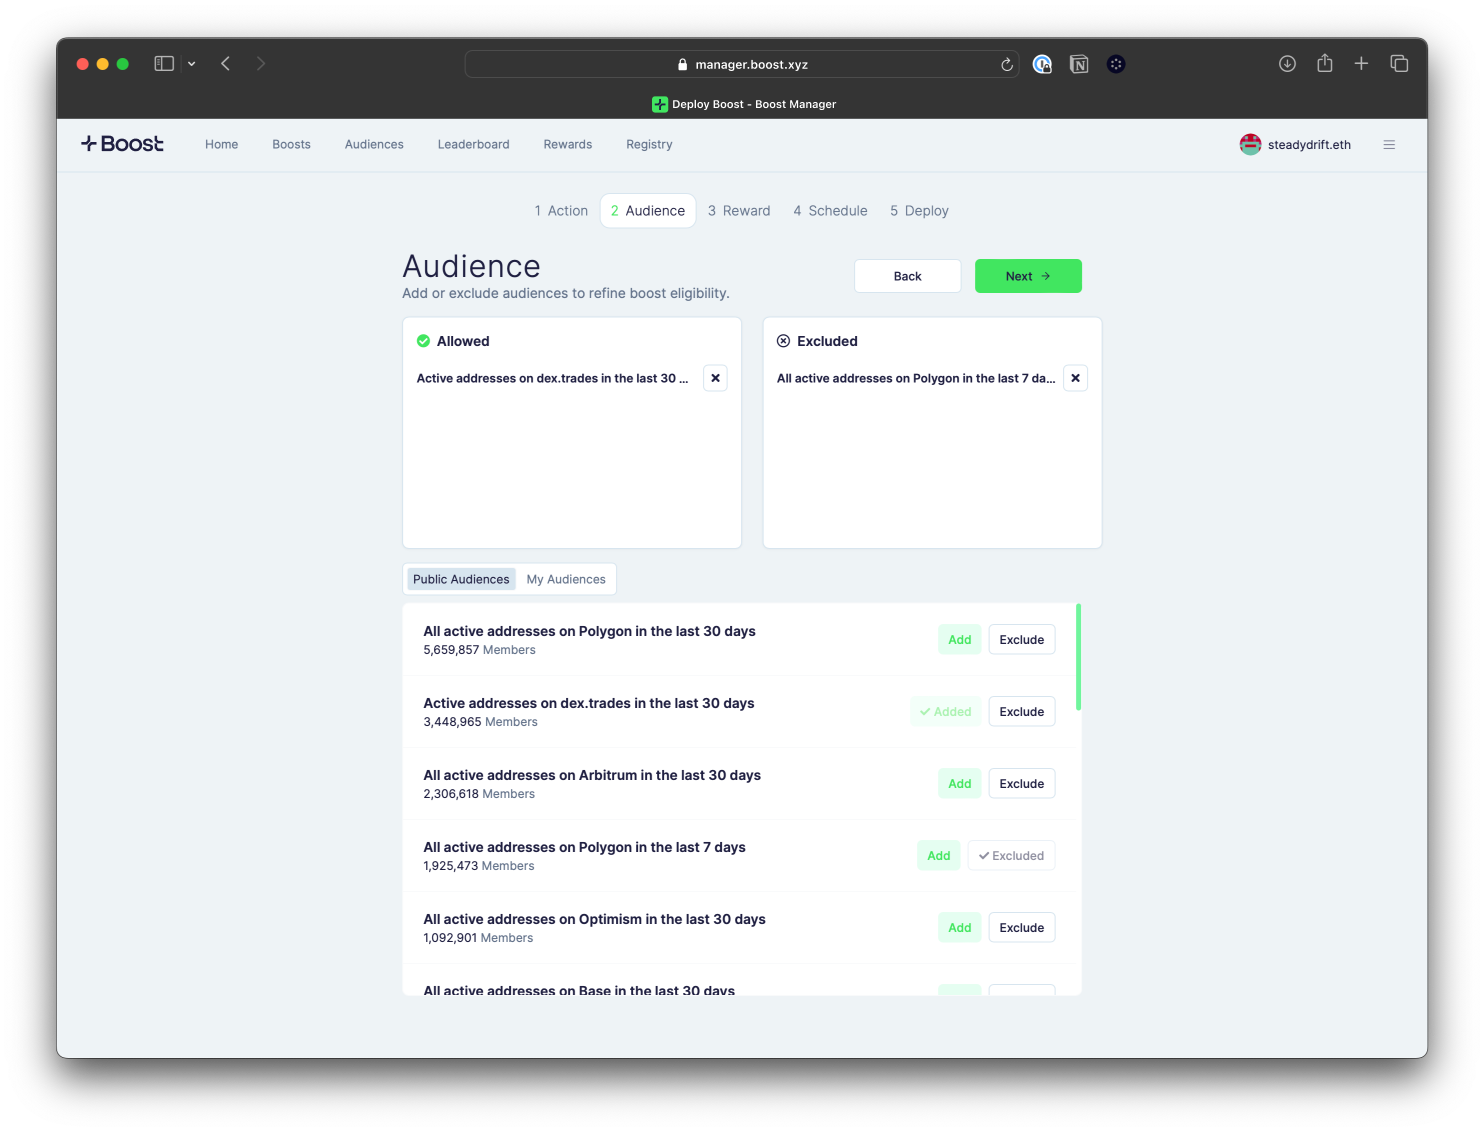
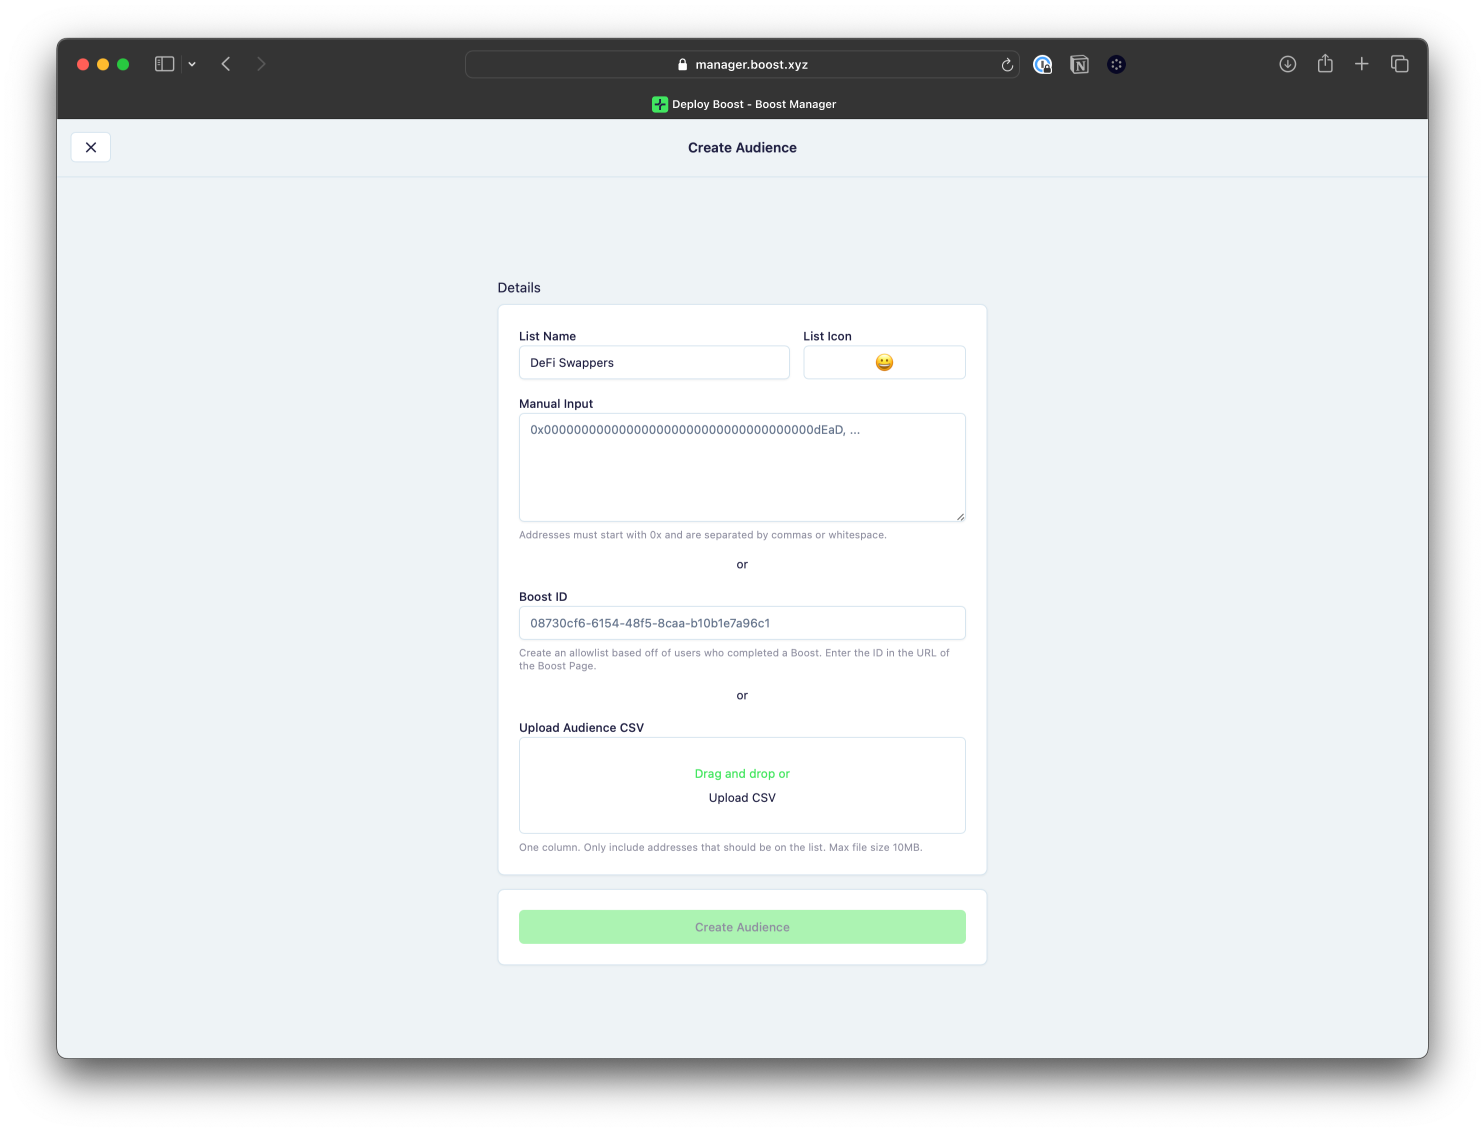
Creating Your Own Audience
To upload your own custom audience, navigate to the “Audiences” tab. You have three options to create your audience:- Manual input: Copy and paste the list of wallet addresses into the text box. Addresses must start with 0x (no ENS) and are separated by commas or whitespace.
- Paste existing Boost ID: Pull wallet address data from a previously deployed boost. This can be your own boost, a competitor’s boost or boost that targets a similar audience as you. Find the Boost ID in the details page of the boost you’d like to pull user data from and input the information.
- Upload a CSV file: Upload a .csv file with one column listing all the wallet addresses. Addresses must start with 0x (no ENS).
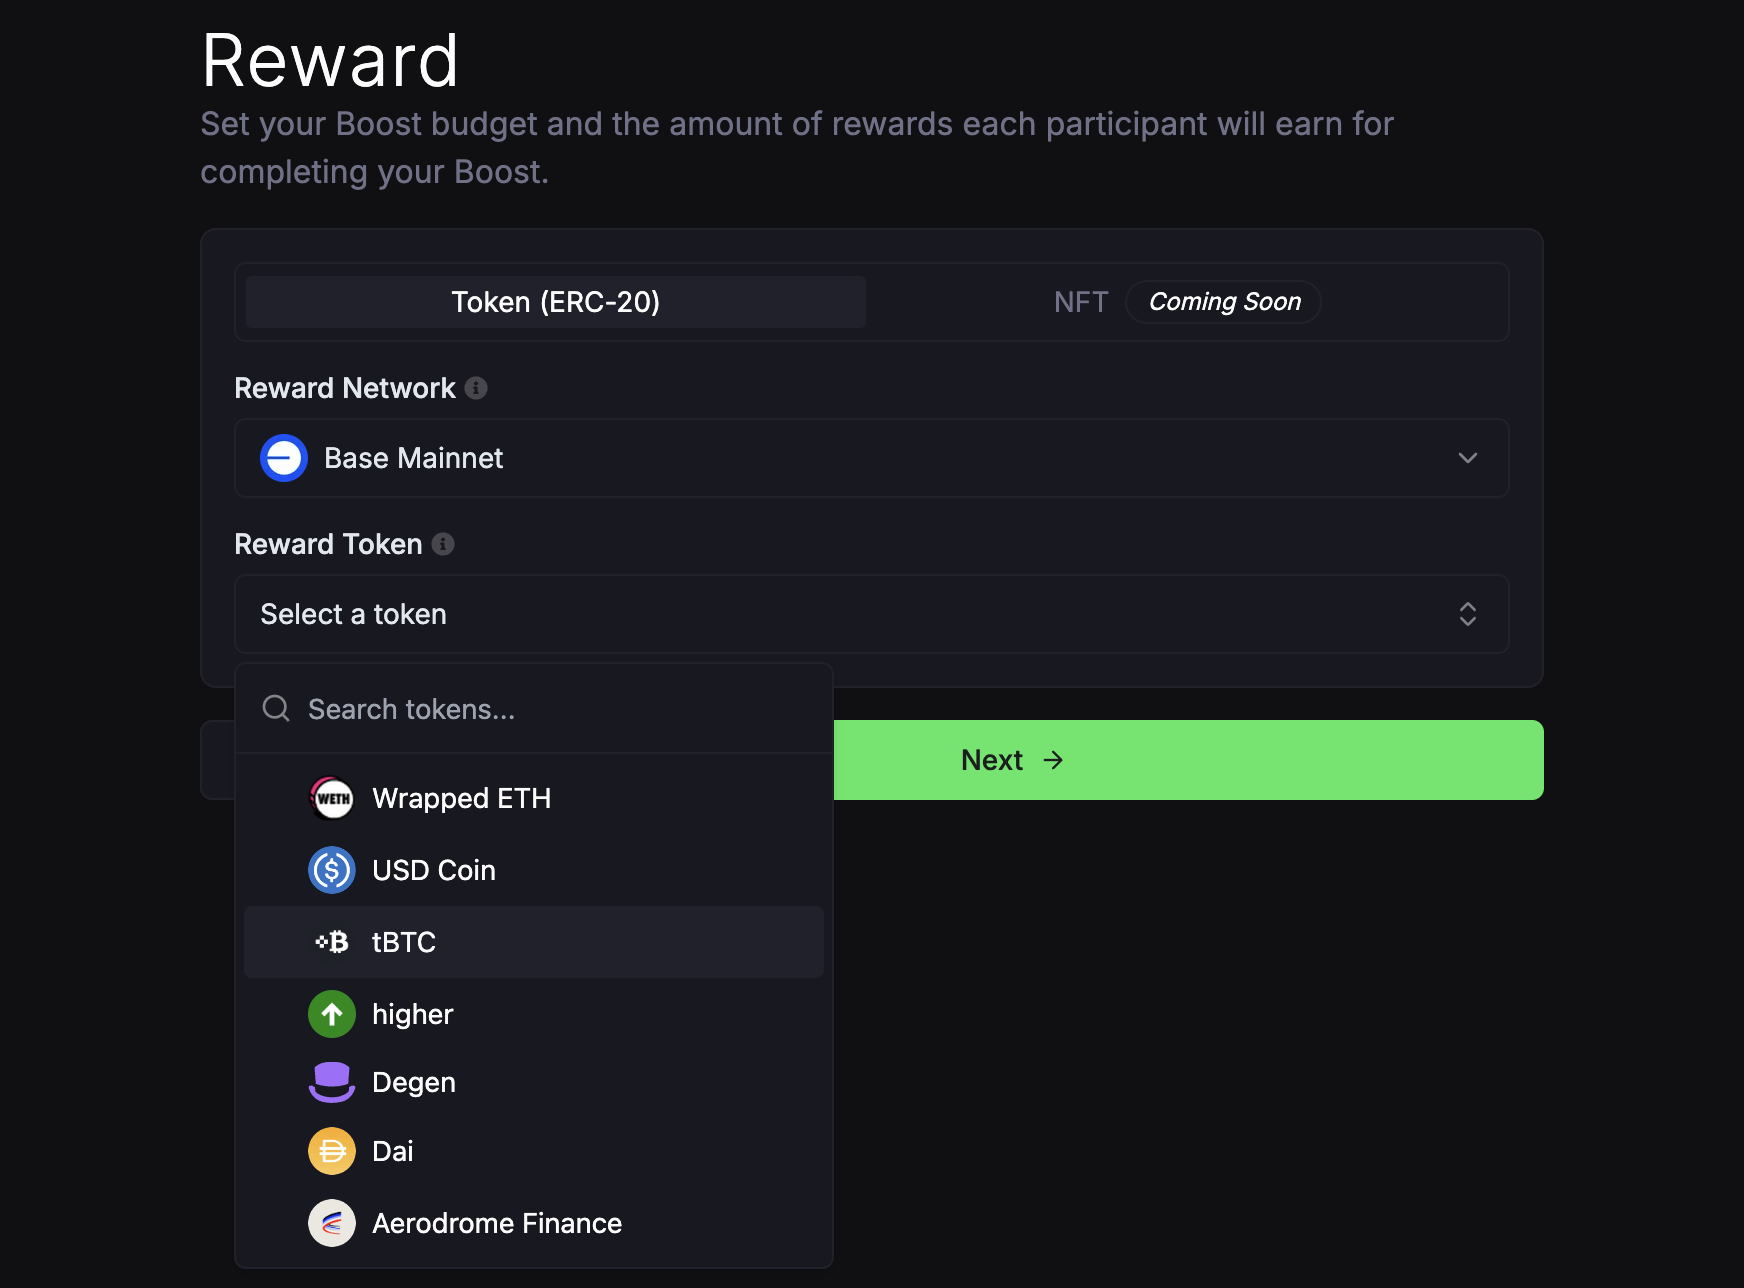
Select the Reward
To incentivize your target recipients to transact, you must select the ERC20 token you’d like to reward users with. Start by selecting the network you want users to receive the token on. Boost currently supports the following networks for token rewards:- Arbitrum
- Base
- Ethereum
- Optimism
- Polygon
- Zora
- zkSync
- Mantle
- Blast
- Degen
- Cyber
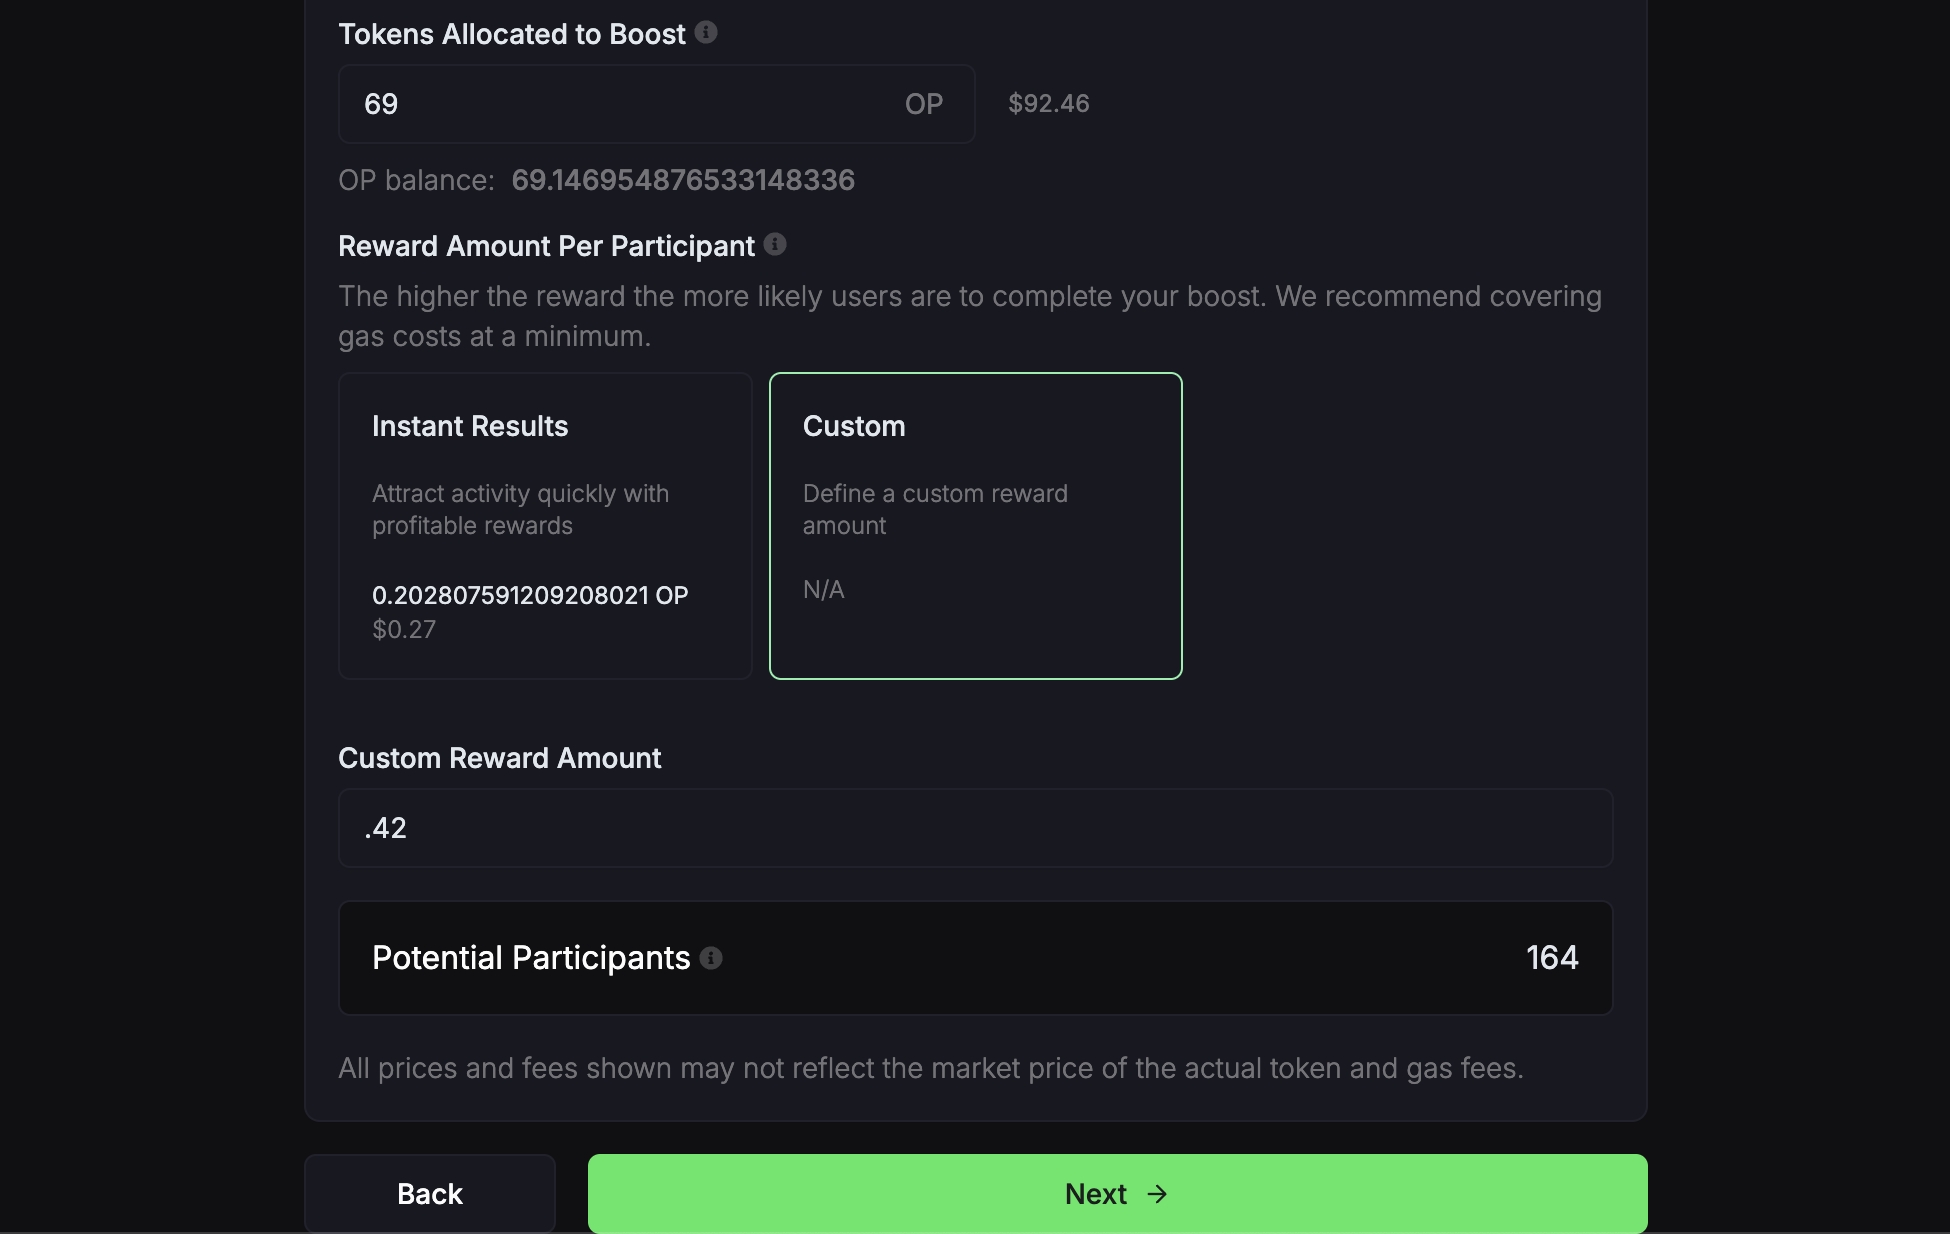
- Gas rebate: a recommended amount that will cover the cost of gas for the user to complete the boost
- Recommended: a recommended amount based on previous boost data with similar attributes.
- Custom: input your own custom reward amount.
Schedule the Boost
You can choose to deploy a boost immediately or you can schedule it at an exact time or date in the future. A boost can be active for a maximum of 30 days. Dates are displayed in your local timezone.
Deploy the Smart Contract
Review all the boost details to ensure the require action, target audience and reward amount is correct. To deploy the boost, you will need to deposit the total reward funds into the smart contract, plus the Protocol Fee. Deploying a boost requires two contract interactions: an approval of tokens and boost deployment. Once the boost has been deployed, you will be directed to a link to view the boost details where performance data is updated in real-time.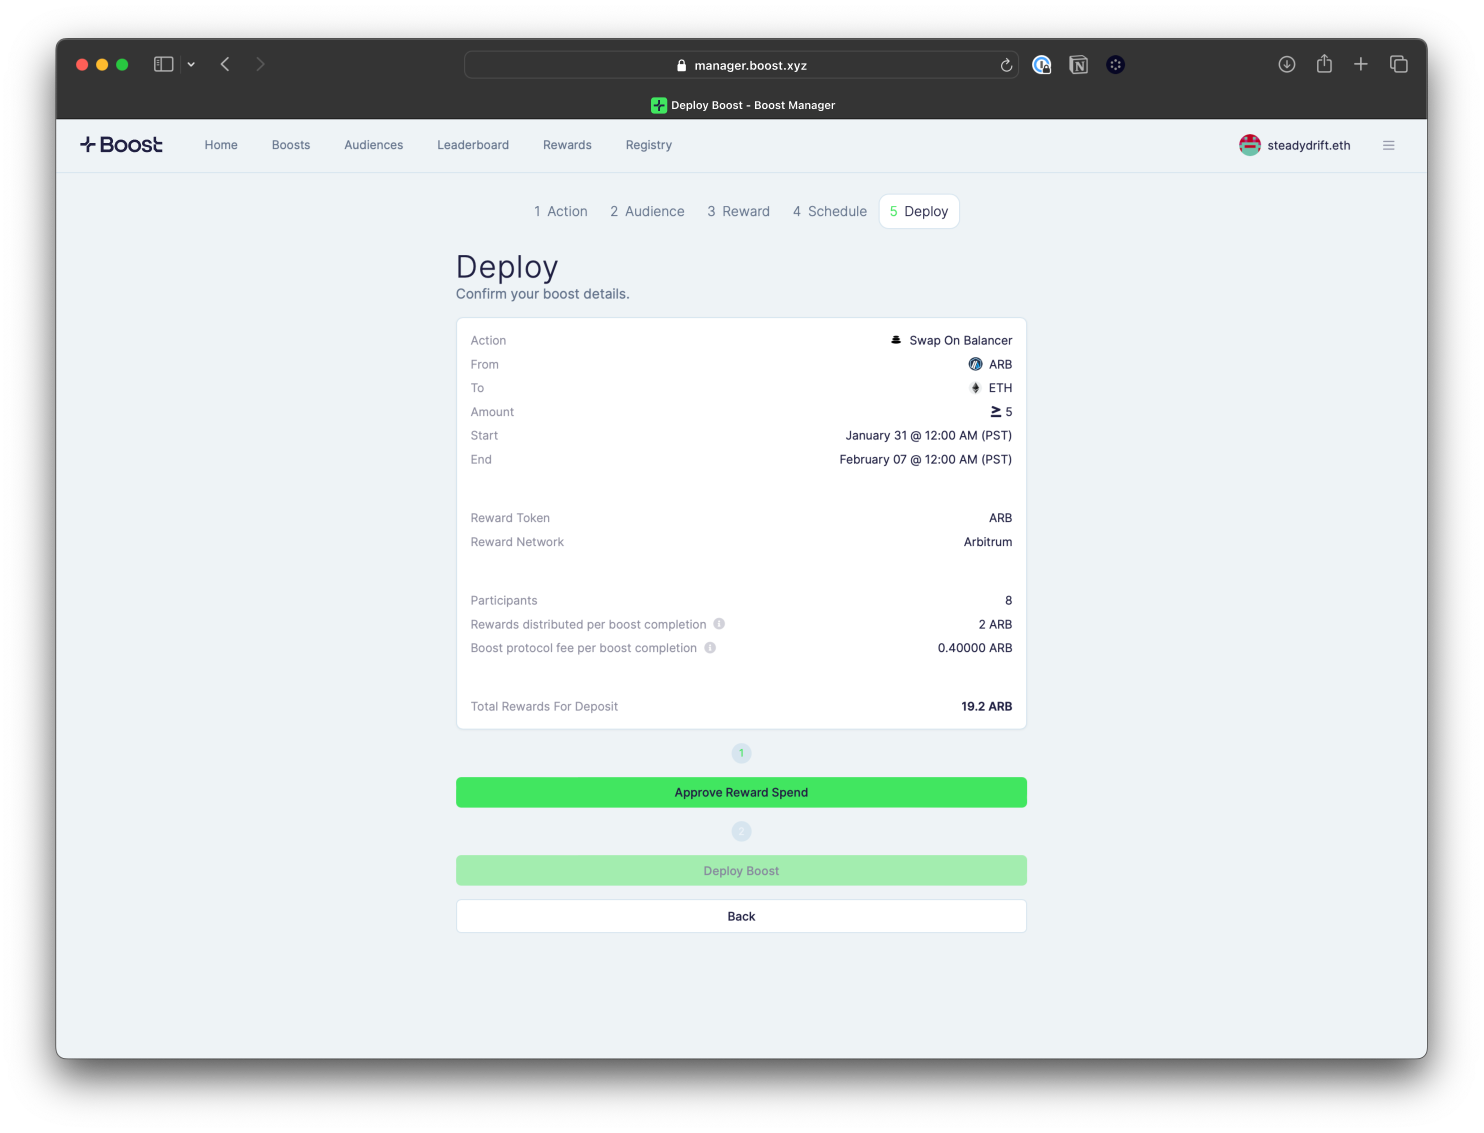
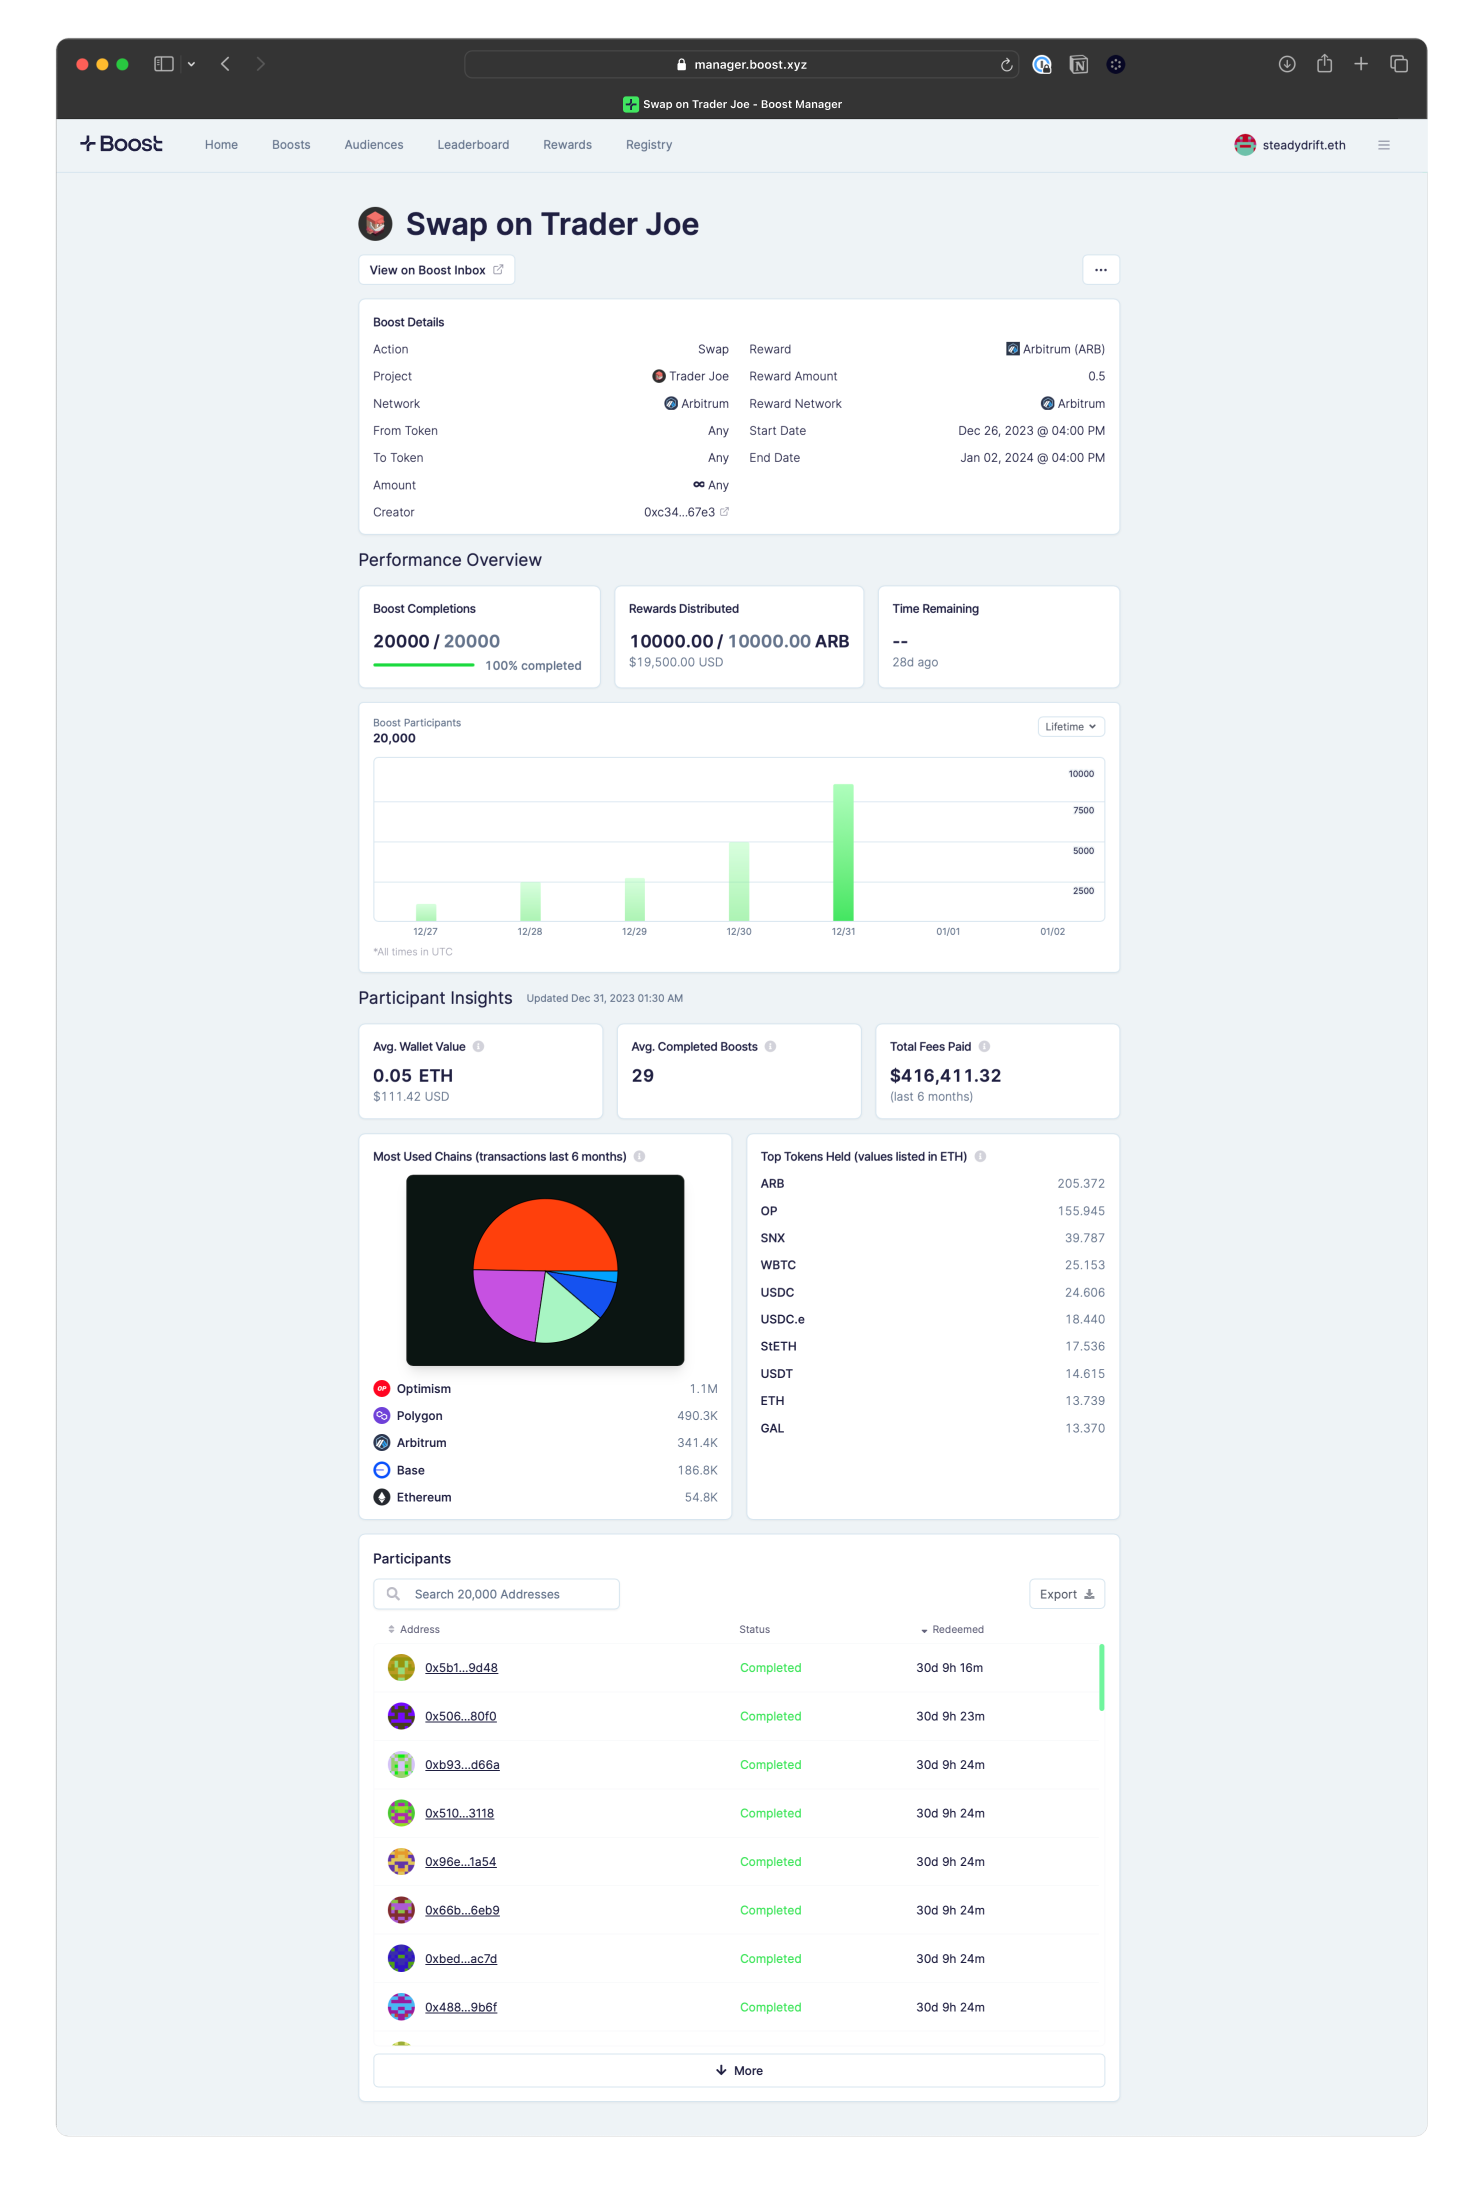
Monitor a Boost
Anyone can see all the active, expired and upcoming boosts under the “Boost” tab in the navigation bar. You can click into any boost to view its detailed description and the performance and user insights:- Performance insights: shows the total number of users that completed the boost transaction and total rewards distributed.
- User insights: shows details of the users that completed the boost, like the hourly/daily breakdown of completions, top protocols used, average wallet balance in ETH, and other transaction history.
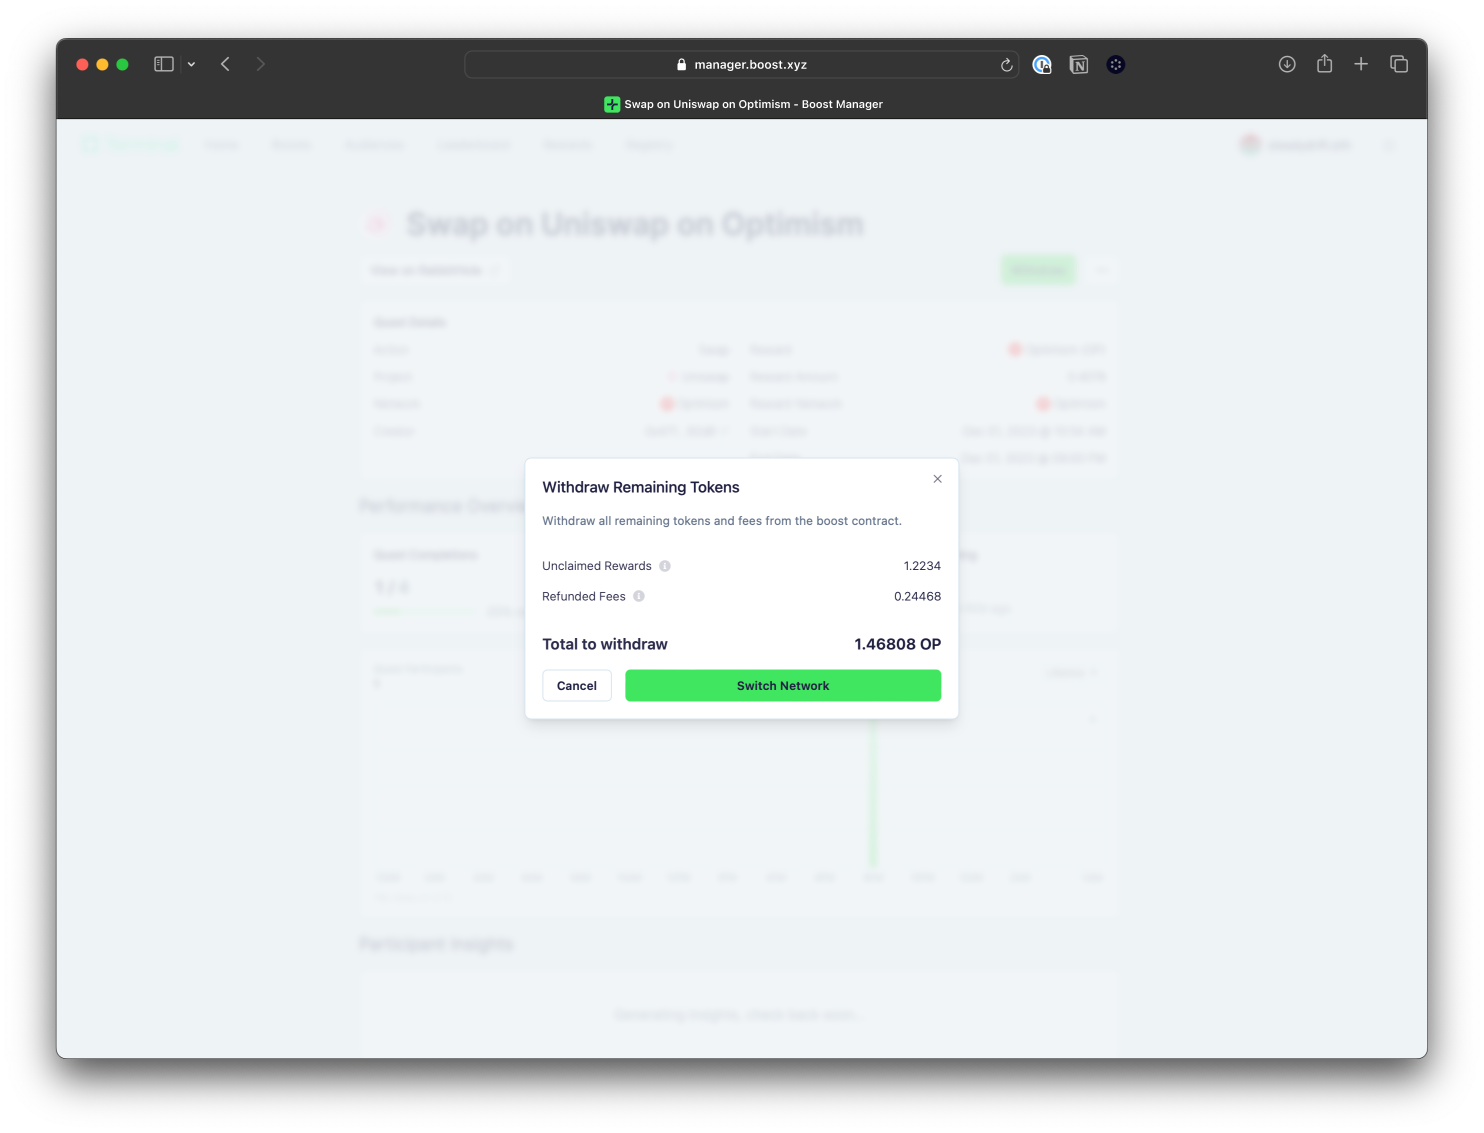
Withdrawing Funds
A key benefit of Boost is that you only pay for results. If you deployed a boost and there are still remaining funds left after it has expired, you can easily withdraw the tokens. Head to the details page of the boost you deployed and on the top left, you will see an option to “Withdraw”.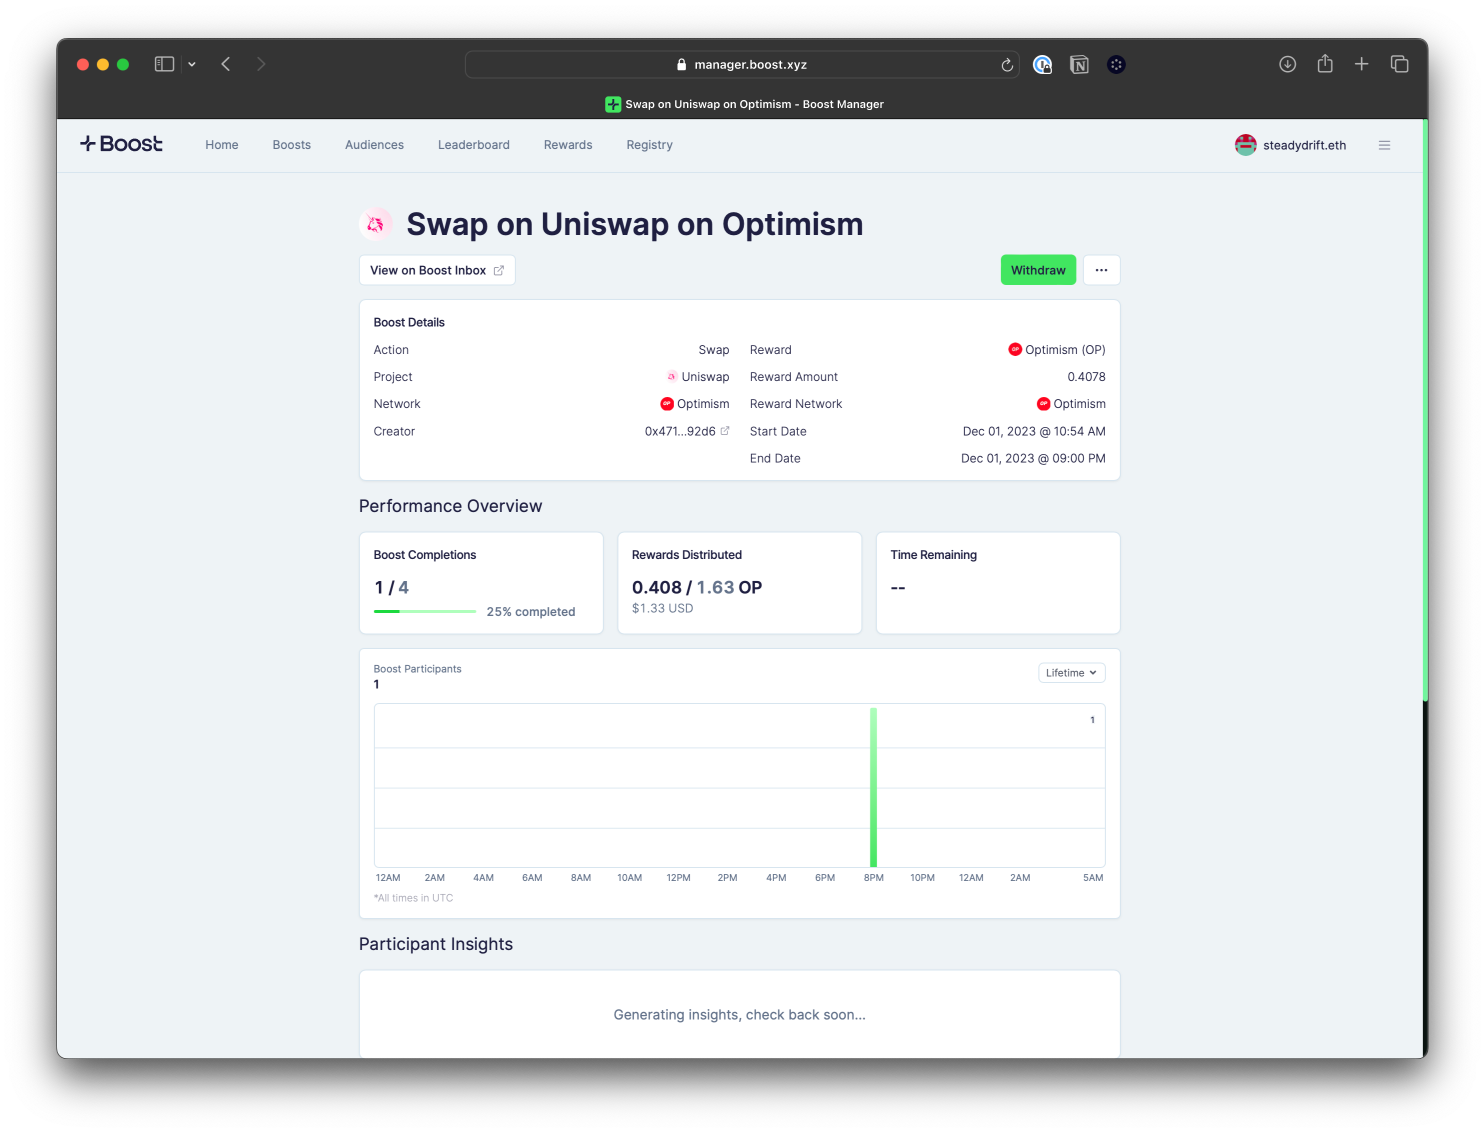
FAQ
What networks does Boost support?
What networks does Boost support?
Actions can currently be tracked and rewards can be distributed on Arbitrum, Optimism, Base, Polygon, Ethereum, Zora, zkSync, Mantle, Blast, Degen, and Cyber. If you’d like to add support for a new network, please fill out this request form.
Can you support offchain action types?
Can you support offchain action types?
Boost Protocol only supports onchain actions to maintain full transparency. A few of the action types that are currently supported are swap, deposit, stake, delegate, mint, bridge and derivatives trades.
What rewards can I distribute on Boost?
What rewards can I distribute on Boost?
Only whitelisted ERC20 tokens can be used as rewards on Boost at this time. For information on the whitelist process, see our How to Add a Token to the Whitelist guide. We’ll be adding support for ERC1155 and onchain points soon.
What are the fees or costs of deploying a boost?
What are the fees or costs of deploying a boost?
Boost takes a 10% fee, which is split onchain with the Boost Guild, a high quality group of contributors, and the affiliate that drives the Boost, aligning incentives between all parties. Learn more about the Protocol Fees.
Where does the boost appear once it deploys?
Where does the boost appear once it deploys?
When the boost is deployed, it appears on the ecosystem of Boost Client apps such as Boost Inbox. Learn more about Boost Client apps.
Can I cancel or pause a boost I deployed?
Can I cancel or pause a boost I deployed?
If you issued a boost and need to stop it, you can use Etherscan to pause the contract. Once successful, you should be able to see the status of the boost on the details page as ‘paused’.
What if not all the token rewards were distributed at the end of the boost?
What if not all the token rewards were distributed at the end of the boost?
If there are any tokens left in the contract once the boost has expired, you can easily withdraw the unused funds by heading the the Details Page of the boost in Boost Manager. The same applies for unused funds from the Protocol Fee deposit.
Why is no one completing my boost?
Why is no one completing my boost?
There are many reasons why your boost may not be getting any transactions. One of the most common reasons is due to high gas fees. When network activity is up, users will have to pay more gas to transact. In this case, you may want to increase the boost reward amount to cover gas fees at minimum. Another common reason for poor boost performance may be related to incorrect audience targeting. You want to make sure that your boost is targeting the right users by leveraging the preset allowlists on Boost Manager or uploading your own CSV list.